Irresistible Chocolate Peanut Butter Poke Cake That’ll Steal the Show
There are desserts… and then there’s Chocolate Peanut Butter Poke Cake—the kind of treat that makes people pause mid-bite and say, “Wait, who made this?” I whipped this up on a lazy Sunday when I had a chocolate craving and a half-empty jar of peanut butter staring me down. It’s cozy, crazy-easy to throw together, and honestly, it tastes like something you’d get at a bakery. Whether you’re hosting a get-together or just want to surprise your family after dinner, this cake is rich, gooey, creamy, and checks every box for dessert perfection. Trust me, this is not your average boxed cake makeover—this is next-level indulgence.
Why You’ll Love This Recipe
- Ultra-moist and flavorful thanks to the peanut butter and sweetened condensed milk combo
- Ridiculously easy to prepare with simple store-bought ingredients
- Make-ahead friendly—even better after chilling in the fridge for a few hours
- Perfect for parties or potlucks because it’s easy to transport and slice
- Customizable: top it with chopped nuts, drizzle with chocolate sauce, or even add crushed cookies
- Kid-approved and adult-obsessed, especially for peanut butter-chocolate fans
Ingredients You’ll Need
For the Cake:
- 1 box chocolate cake mix (plus ingredients listed on the package—usually eggs, oil, and water)
- 1 cup creamy peanut butter, melted
- 1 can (14 oz) sweetened condensed milk
For the Topping:
- 1 container (8 oz) whipped topping (like Cool Whip), thawed
- 1/2 cup peanut butter, melted
- 1/4 cup powdered sugar
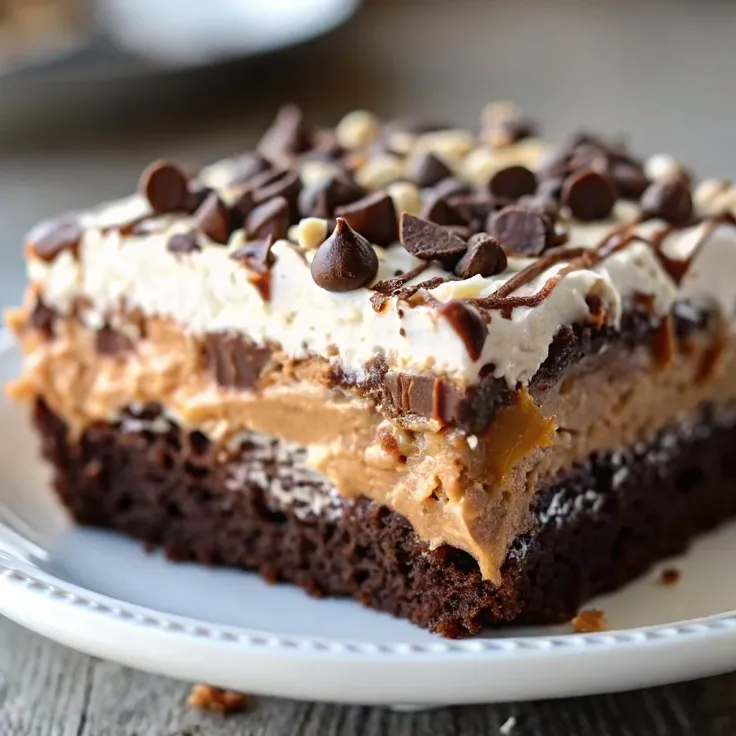
- 1/2 cup mini chocolate chips or chocolate shavings (optional for garnish)
Step-by-Step Instructions
- Bake the chocolate cake
Preheat your oven according to the cake mix package instructions. Prepare the cake mix as directed (typically mixing with eggs, oil, and water). Pour the batter into a greased 9×13-inch baking dish and bake until a toothpick inserted in the center comes out clean—usually around 25 minutes. - Let it cool and poke holes
Once the cake is baked, take it out of the oven and let it cool for about 10 minutes. Then, using the handle of a wooden spoon (or anything similar), poke holes all over the top. Aim for holes every inch or so. - Make the filling
Melt 1 cup of peanut butter until smooth, then stir it together with the sweetened condensed milk. Pour this rich mixture over the warm cake, letting it drip into every hole. This is where the magic happens—it makes the cake ultra-moist and flavorful. - Cool the cake completely
Let the cake sit at room temperature until fully cooled. You don’t want to add the whipped topping too soon or it’ll melt and lose its fluffiness. - Make the peanut butter topping
In a medium bowl, combine the thawed whipped topping with 1/2 cup melted peanut butter and powdered sugar. Fold gently until everything is smooth and creamy—it should look like a peanut butter mousse. - Frost the cake
Spread the peanut butter topping evenly over the cooled cake using a spatula. Smooth it out all the way to the edges. - Garnish and chill
Sprinkle mini chocolate chips or chocolate shavings on top for extra texture and visual appeal. Cover the cake and refrigerate for at least 2 hours—this helps all the flavors meld together into one dreamy dessert.
Variations
- Gluten-free: Use a gluten-free chocolate cake mix to make this dessert safe for gluten-sensitive guests.
- Nut-free: Sub sunflower seed butter for peanut butter if you’re avoiding nuts.
- Low-carb: Use a sugar-free cake mix and whipped topping alternative.
- Extra chocolatey: Drizzle melted chocolate or chocolate syrup over the topping layer.
- Crunchy twist: Add crushed pretzels or toffee bits on top for a salty-sweet finish.
- Fruit infusion: Add sliced bananas or strawberries between the filling and topping layers for a fruity surprise.
How to Serve
This cake is best served cold, straight from the fridge. Slice it into squares and serve on a cute dessert plate or rustic wooden board for a cozy vibe. Top each piece with a drizzle of chocolate syrup or a dollop of whipped cream if you’re feeling extra. It pairs beautifully with a cup of coffee, a glass of milk, or even a scoop of vanilla ice cream. Serve it at:
- Family dinners
- Potlucks and gatherings
- Birthday parties
- Weeknight dessert treats
Recipe Tips
- Don’t skip the poking—the holes help the peanut butter-condensed milk mixture soak in properly.
- Melt the peanut butter slowly to avoid burning; 20–30 seconds in the microwave works great.
- Let the cake cool before frosting to keep the topping light and fluffy.
- Chill the cake for at least 2 hours, but overnight is even better for flavor.
- Make ahead up to 2 days in advance—just keep it covered in the fridge.
- Store leftovers in the refrigerator for up to 4–5 days.
- Use mini chocolate chips or chocolate curls for an elegant finish.
Prep Time: 15 minutes
Cook Time: 25 minutes
Total Time: 2 hours 40 minutes (including chilling)
Yield: 12 servings
FAQs
Can I use homemade whipped cream instead of Cool Whip?
Yes! Just make sure it’s stabilized whipped cream if you’re planning to store the cake for more than a few hours.
Can I freeze Chocolate Peanut Butter Poke Cake?
Absolutely. Wrap it tightly and freeze for up to 2 months. Thaw overnight in the fridge before serving.
Can I use chunky peanut butter?
You can, but it won’t pour as smoothly into the holes. For best results, stick with creamy or melt chunky peanut butter and strain it.
Is this too sweet?
It is sweet, but not overwhelming. If you’re concerned, reduce the amount of condensed milk slightly or use unsweetened peanut butter.
Can I make it in a different pan size?
You can make this in two 8×8 pans if needed—just reduce the bake time slightly and check for doneness early.
Conclusion
If you’re looking for a no-fail dessert that hits all the right notes—easy, indulgent, nostalgic, and full of flavor—Chocolate Peanut Butter Poke Cake is the answer. It’s the kind of dessert that looks impressive but comes together with pantry staples and a bit of love. Whether you’re hosting or just treating yourself, this is a cake you’ll come back to again and again. So go ahead—poke, pour, chill, and dig in. You deserve it.